This guide provides a walkthrough on how to run a Custom Lens analysis in Qualz.ai.
What is Custom Lens Analysis? #
Custom Lens Analysis is a powerful feature that allows you to define your own analytical framework tailored to your specific research objectives and data nuances. Instead of relying on pre-built analysis lenses, you can provide detailed instructions on exactly how you want your data analyzed, what themes to look for, and how to organize the results – giving you complete control over your qualitative research methodology.
Step 1: Prepare Your Interview Transcripts #
To get started with Custom Lens Analysis, you’ll need transcripts of interviews uploaded into your Qualz.ai workspace. You can do this in two ways:
- Use AI-Moderated Interviews: If you’ve conducted interviews using Qualz.ai’s AI-Moderated Interview feature, transcripts are automatically generated, saving you significant time and effort. Ensure these sessions are marked as complete.
- Upload Existing Transcripts: For interviews conducted manually or transcribed elsewhere, you can easily upload your transcript files. Qualz.ai supports video, audio, and text in all common or majorly used formats. Navigate to the appropriate section in the platform to upload and process these files.
Step 2: Navigate to the “Run Analysis” Section #
With your transcripts ready to be analyzed, you can initiate the analysis process:
- Click on the “Run Analysis” tab.
- The “Run Analysis” area gives you the option to choose various analysis lenses.
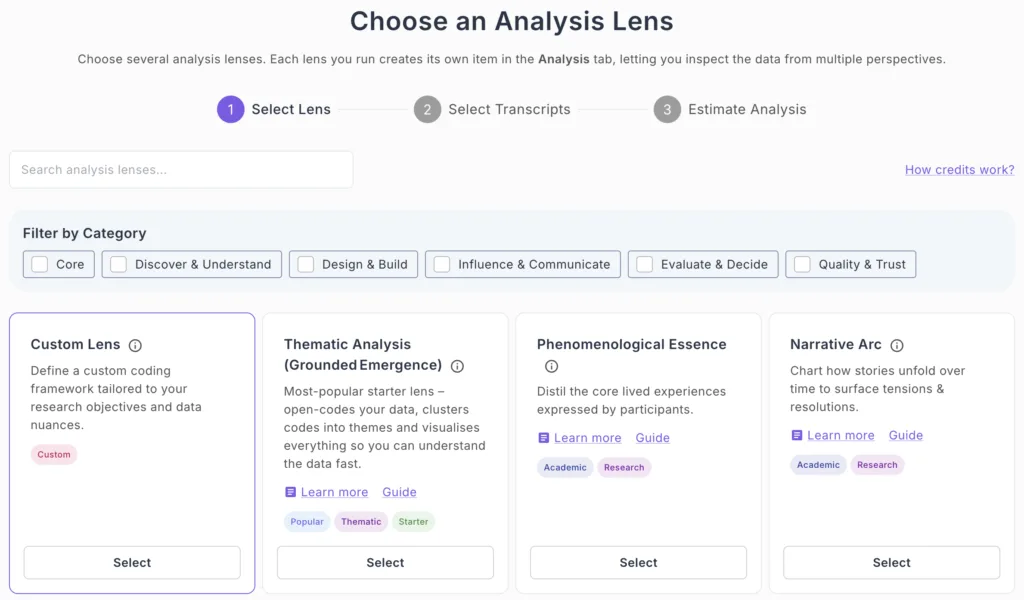
Step 3: Select Custom Lens and Define Your Framework #
Here, you’ll create your custom analysis framework:
- Select “Custom lens” which opens the Custom Lens configuration dialog.
- Define Your Instructions: In the “Add Custom Lens / Framework” dialog, you’ll see: Top Guidelines:
- Describe how you want the analysis done in plain English
- If you already use codes/themes, or a framework, describe them
- Say how to organize results and what to include
- Enter Your Instructions (required): In the instructions field, provide detailed guidance for your analysis. Things you can include:
- Priorities: what to focus on (topics, questions, audiences). A list of themes, concepts or qualitative codes to look for Description of the purpose or the intent of the analysis
- Review Your Instructions: You can click “Read the guidelines” or “Watch a short walkthrough” for additional help.
- Click “Continue” once you’ve defined your framework.
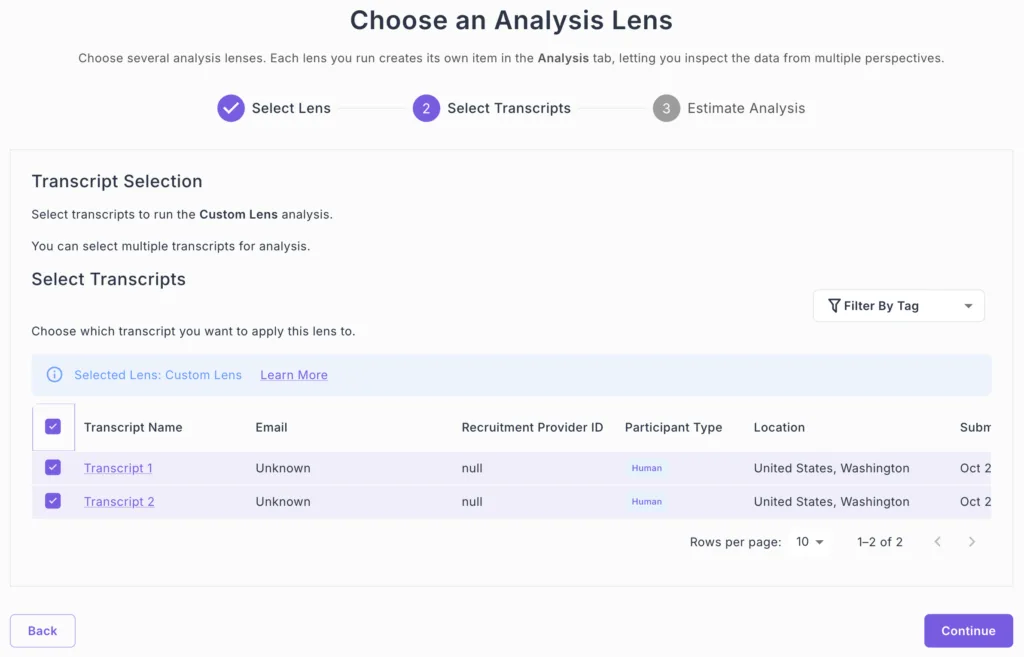
Step 4: Select Your Interview Transcripts #
Now you’ll choose which transcripts to analyze with your custom framework:
- The “Transcript Selection” screen will appear.
- Check the box next to each transcript you wish to analyze.
- You can filter transcripts by tag using the “Filter By Tag” dropdown if needed.
- Click “Continue” to proceed to the Estimate Analysis.
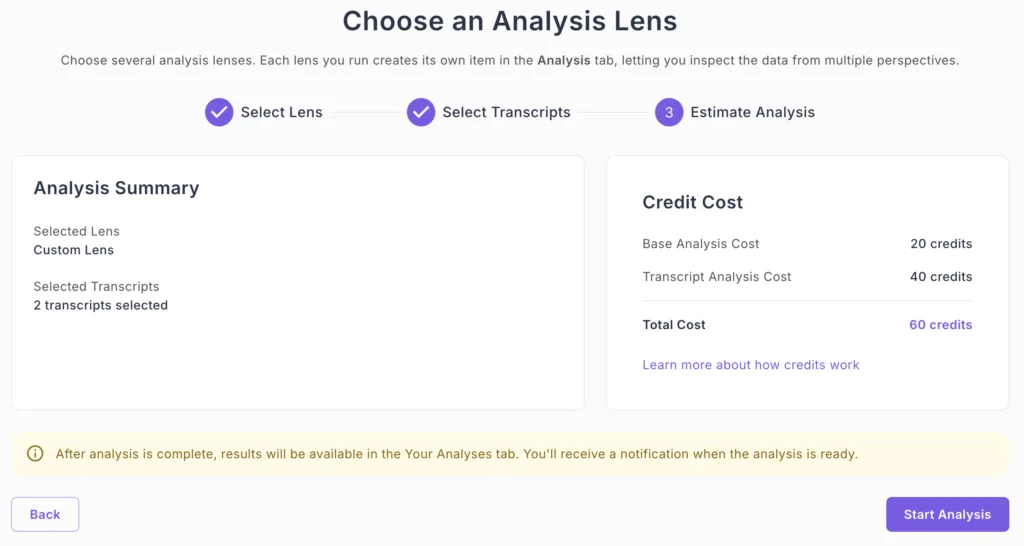
Step 5: Review and Start Analysis #
Before running the analysis, review the summary:
Analysis Summary:
- Selected Lens: Custom Lens
- Selected Transcripts: [number] transcripts selected
Estimated Credit Cost:
- Base Analysis Cost: 20 credits
- Transcript Analysis Cost: 20 credits per transcript
- Total Cost: Base Analysis Cost + Transcript Analysis Cost. Will be displayed based on your selection
Note: After analysis is complete, results will be available in the “Your Analyses” tab. You’ll receive a notification when the analysis is ready.
Click “Start Analysis” to begin processing.
Step 6: Monitor Analysis Progress #
Once started, you’ll see a progress notification:
- Check the notification for analysis progress status.
- You will also be notified via email when you analysis is complete.
- If you receive an email notification that your analysis is complete but it does not appear in your dashboard, please refresh the page.
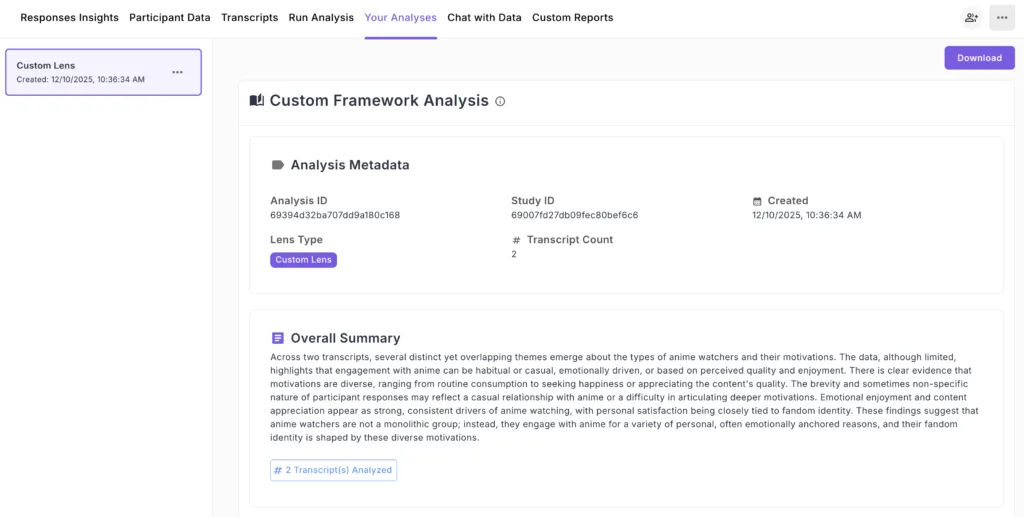
Step 7: View Results in “Your Analyses” #
Navigate to the “Your Analyses” tab to view your completed custom lens analysis:
Analysis Overview #
Your Custom Framework Analysis includes:
Analysis Metadata:
- Analysis ID
- Study ID
- Created date and timestamp
- Lens Type: Custom Lens
- Transcript Count
Overall Summary: A comprehensive narrative summary synthesizing the key findings from your custom framework, highlighting patterns, insights, and notable observations based on your specific instructions.
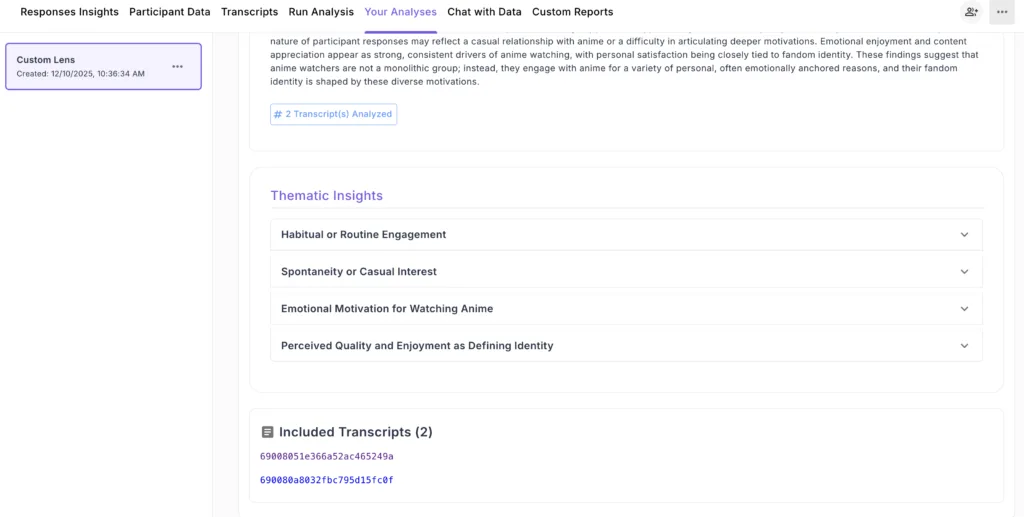
Thematic Insights #
The analysis organizes findings into expandable thematic sections based on your custom instructions:
- Theme Categories: Each theme identified in your framework appears as an expandable section.
- Representative Quotes: Click to expand any theme to view:
- Detailed analysis of that theme
- Direct quotes from participants that illustrate the theme
- Context and interpretation based on your framework
- Included Transcripts: A list of all transcript IDs analyzed in this lens run.
Download Your Results #
Click the “Download” button in the top right to export your custom analysis results for further review, reporting, or sharing with stakeholders.
Ready to Create Your Custom Analysis? #
Transform your interview data with frameworks designed specifically for your research needs. Custom Lens gives you the flexibility of tailored analysis with the speed and scale of AI automation.
Schedule a demo now to see how Custom Lens can accelerate your qualitative research workflow!


