Master workspace management in Qualz.ai – your comprehensive guide to creating, switching, and managing multiple workspaces for organized research. Learn how to set up workspace environments, manage teams, and seamlessly switch between different research projects.
Prerequisites: Understanding Workspace Limits #
Before creating workspaces, understand your tier limits:
- Standard Tier: 1 workspace only (must upgrade to professional to create more)
- Professional Tier: Multiple workspaces allowed
How to Create a New Workspace
#
Creating a new workspace takes just 3 simple steps. This is available for Professional and Enterprise tier users.
Step 1: Access Workspace Creation #
- Click your workspace name in the top-left corner
- Select “Create New Workspace” from the dropdown
- The Create New Workspace wizard opens
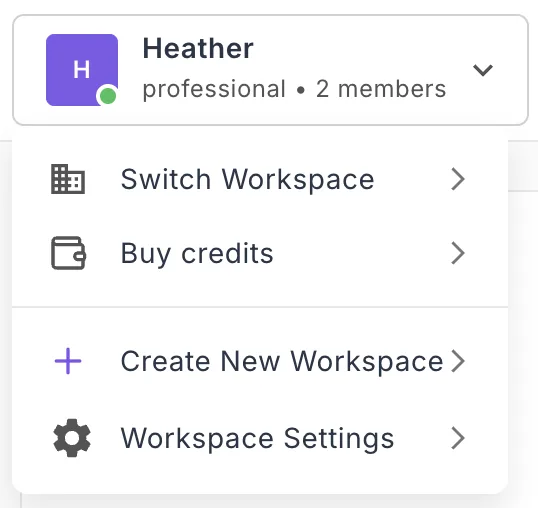
Standard tier users: If you see an upgrade prompt, you’ll need to upgrade to Professional first before creating additional workspaces.
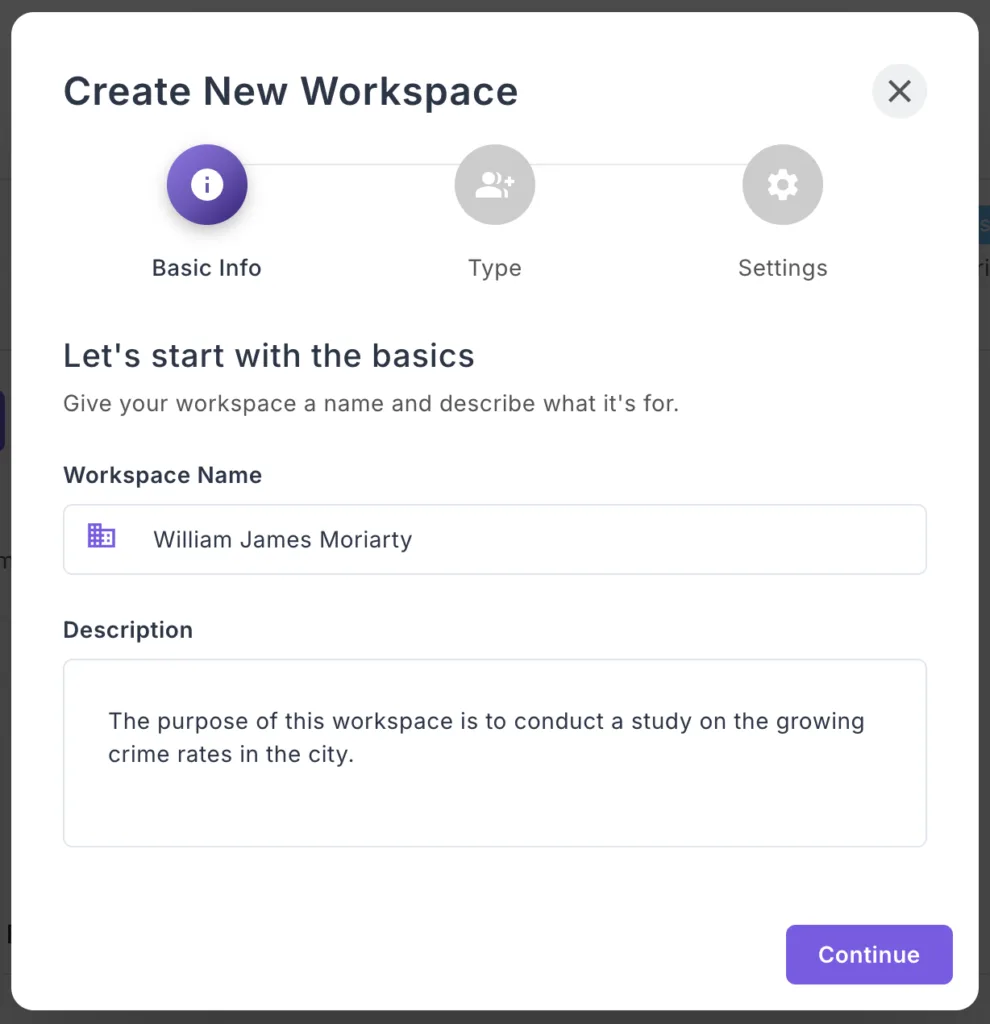
Step 2: Basic Information (3-Step Process) #
Name and Description #
Workspace Name:
- Enter a clear, descriptive name. Tip: Choose one that you or your team members can easily remember and intuitively recognize.
- Examples: “Client ABC Research” or “Healthcare Q1 2025”
Description:
- Provide a short description of what the workspace will be used for—its specific purpose. You can be as detailed as you like in this description.”
- Example: “Customer satisfaction surveys for healthcare clients”
Click “Continue” to proceed.
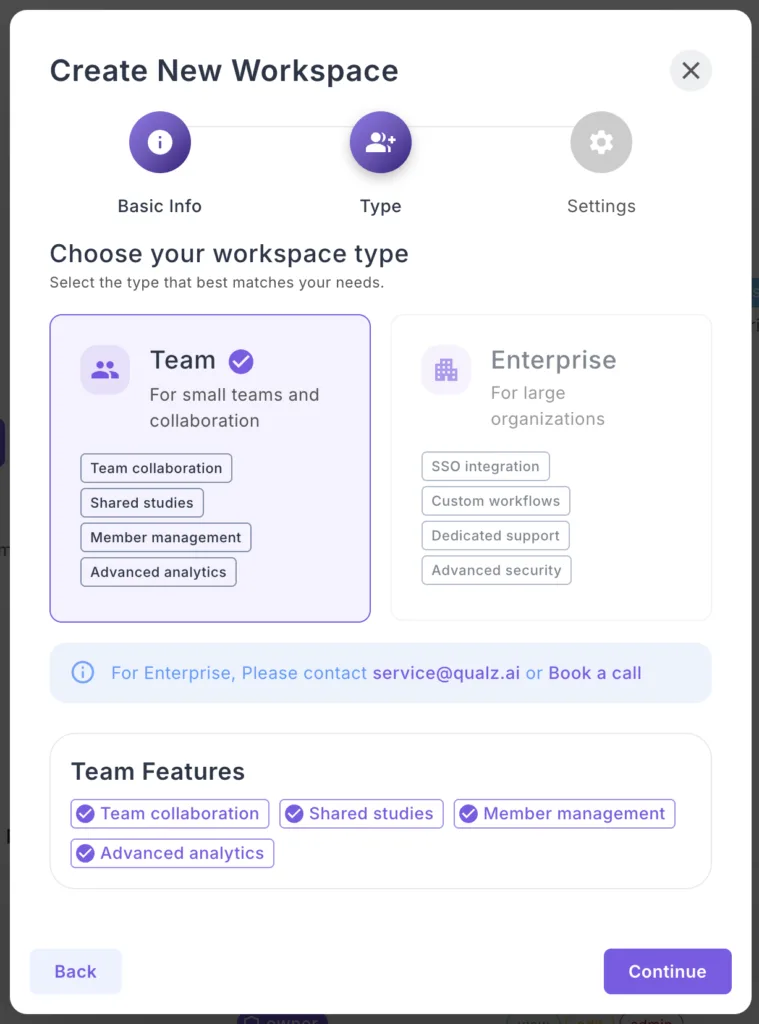
Step 3: Choose Workspace Type
Team Workspace (Recommended):
- For small teams and collaboration
- Features: Team collaboration, shared studies, member management, advanced analytics
- Best for most users
Enterprise Workspace:
- For large organizations
- Features: SSO integration, custom workflows, dedicated support, advanced security
- Contact service@qualz.ai to discuss Enterprise needs
Select Team and click “Continue”.
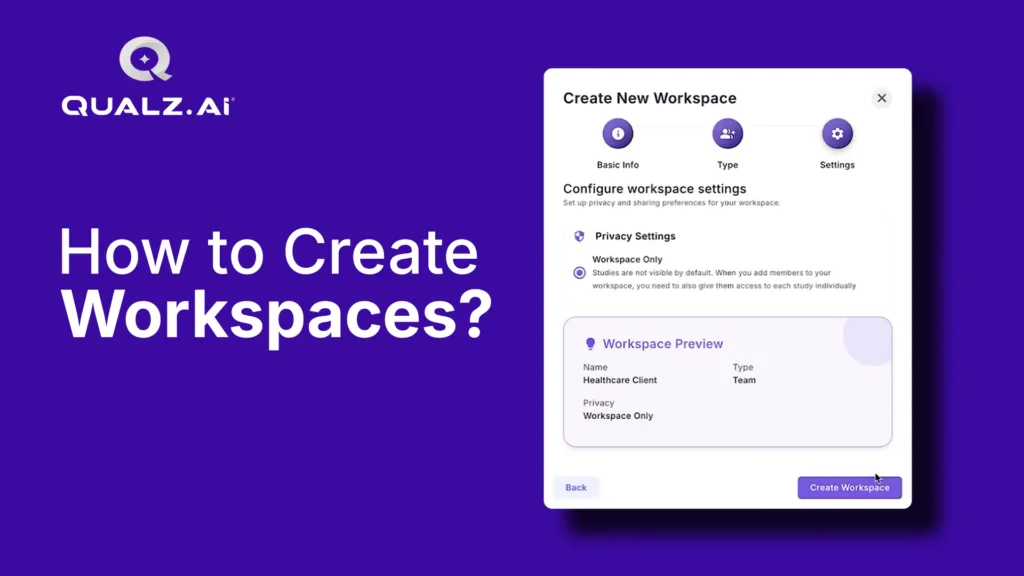
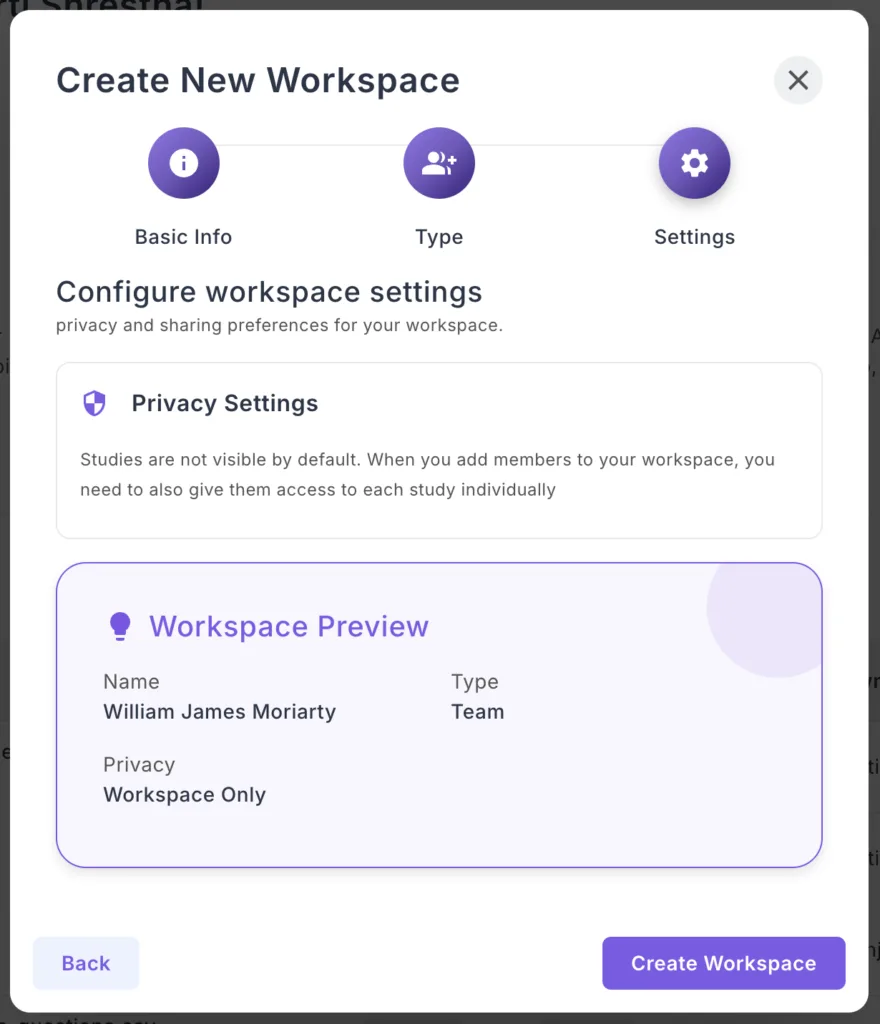
Step 4: Configure Settings #
Privacy Settings:
Choose “Workspace Only” (recommended):
- Studies are not visible by default
- Only workspace members can access research data
- Maximum privacy and security
Workspace Preview:
Review your configuration:
- Name – Verify it’s correct
- Type – Team or Enterprise
- Privacy – Workspace Only
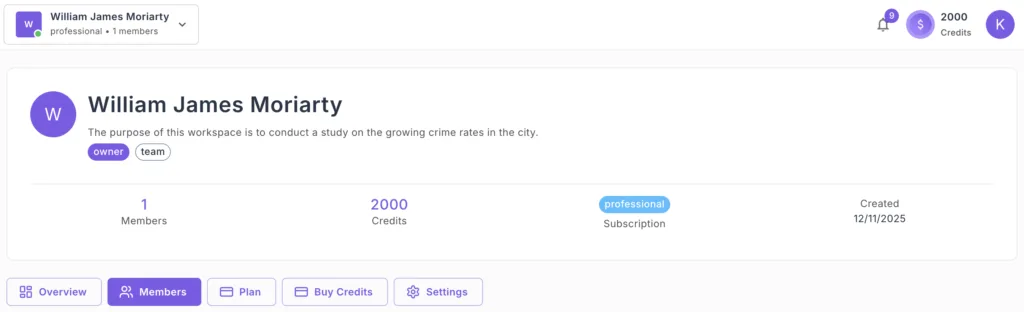
Step 6: Create Your Workspace #
- Review all settings in the preview
- Click “Create Workspace”
- Where the user is directed to the payment wall.
- Where you have to go through the payment process to access your new workspace.
- After your subscribe to the plan your are directed to your new workspace dashboard automatically.
Success! Your new workspace is ready.
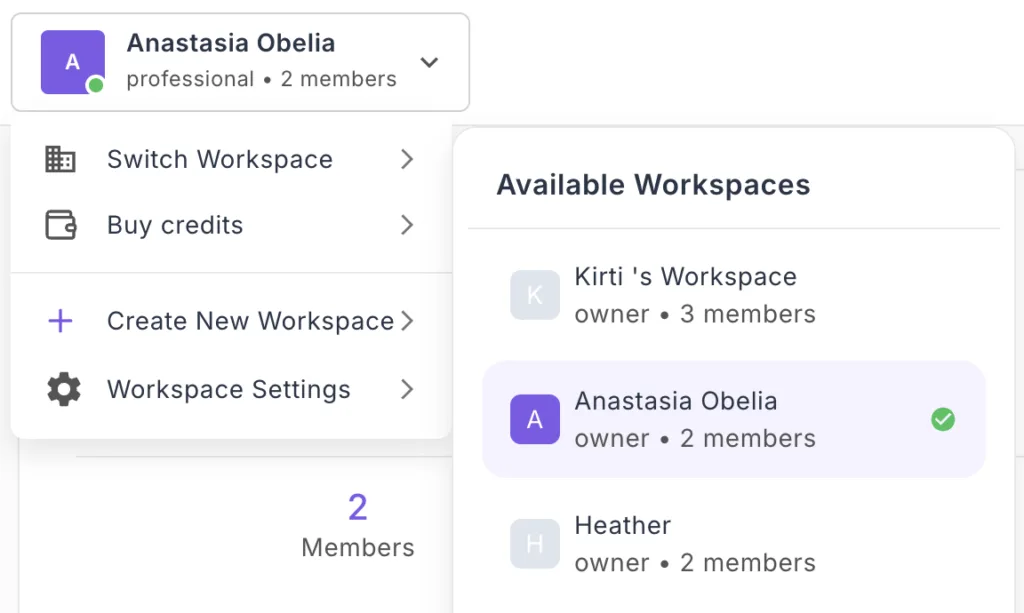
How to Switch Between Workspaces #
Switching workspaces is quick and simple. Use this when you need to switch from one workspace to another.
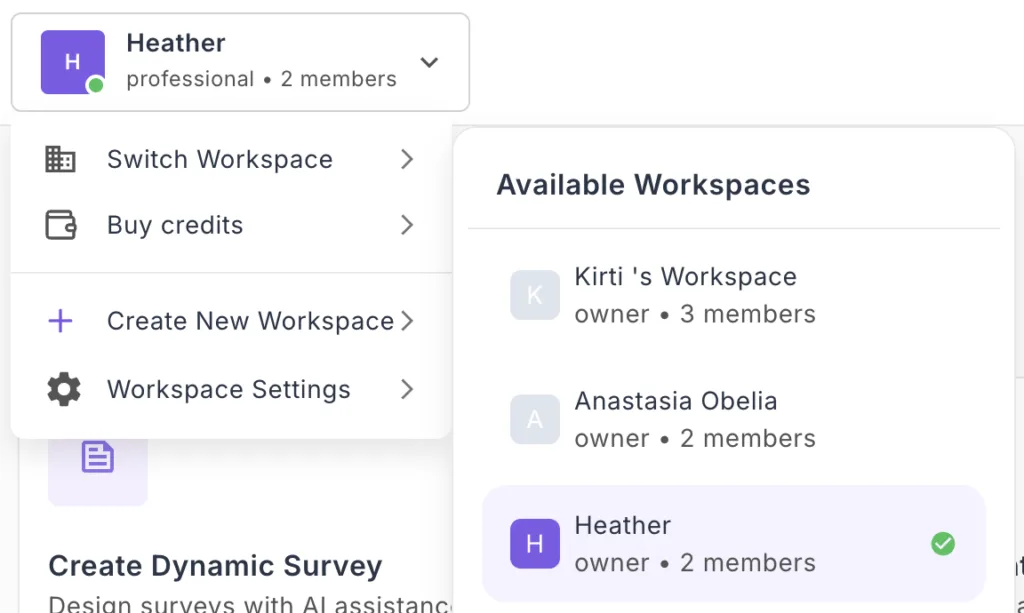
Step 1: Open the Workspace Switcher #
- Look at the top-left corner of your dashboard
- Click on your current workspace name
- You’ll see your workspace initial, name, tier, and member count
- A dropdown menu appears

Step 2: Click “Switch Workspace” #
- In the dropdown menu, click “Switch Workspace”
- The “Available Workspaces” panel slides in from the right
- All workspaces you have access to are displayed
Step 3: Select Your Target Workspace #
In the Available Workspaces panel, you’ll see:
- Workspace name and initial
- Your role (Owner, Admin, Member, or Guest)
- Member count (e.g., “2 members”)
- Checkmark on your currently active workspace
To switch:
- Click on any workspace you want to switch to.
- The dashboard immediately refreshes
- You’re now working in the selected workspace
That’s it! All your actions now occur within the new workspace context.