Add team members to your Qualz.ai workspace – learn how to send invitations, assign roles, and collaborate with your research team effectively.
What is Member Invitation? #
Member invitation allows workspace Owners and Admins to add team members who can collaborate on research activities. Invited members receive an email notification and must accept the invitation to join your workspace.
When you invite members, you:
- Grant access to your workspace research
- Assign specific roles and permissions
- Enable team collaboration
- Maintain control over who sees your data
Note: Only workspace Owners and Admins can invite members. Members and Guests cannot send invitations.
Precondition: Qualz.ai Account Required #
User should create Qualz.ai account before being a part of the workspace. They can be invited even if they don’t have Qualz.ai account.
Step 1: Access the Members Section #
To invite members, navigate to your workspace member management area.
Navigate to Team Members #
- Click on the “Members” tab in your workspace overview
- Or access Workspace Settings → Members section
- The Team Members page displays
You’ll see:
- Current member count
- Active members list
- Pending invitations count
- “Invite Members” button (top-right)

Step 2: Click “Invite Members” Button #
Start the invitation process by clicking the invitation button.
Open Invitation Dialog #
- Locate the “Invite Members” button in the top-right corner
- Click to open the invitation dialog
- The “Invite New Member” modal appears
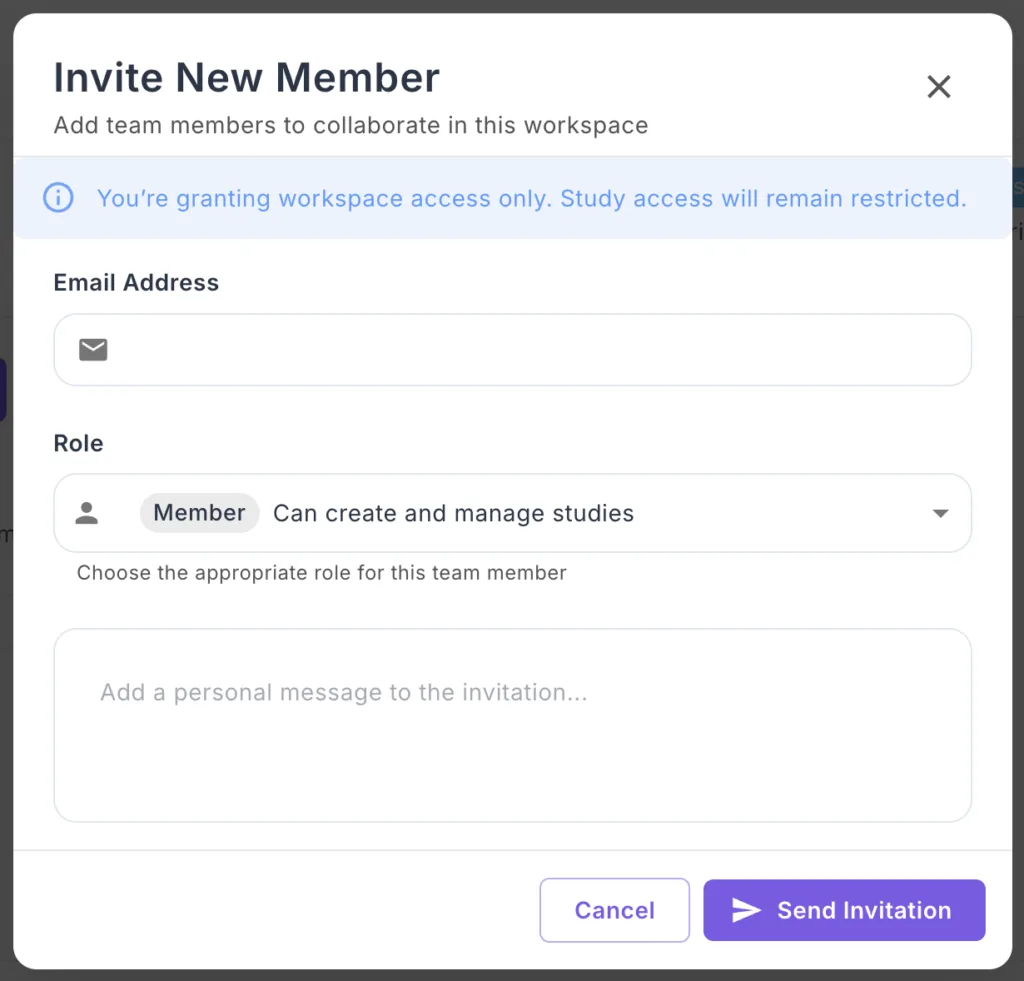
Step 3: Enter Member Email Address #
Provide the email address of the person you want to invite.
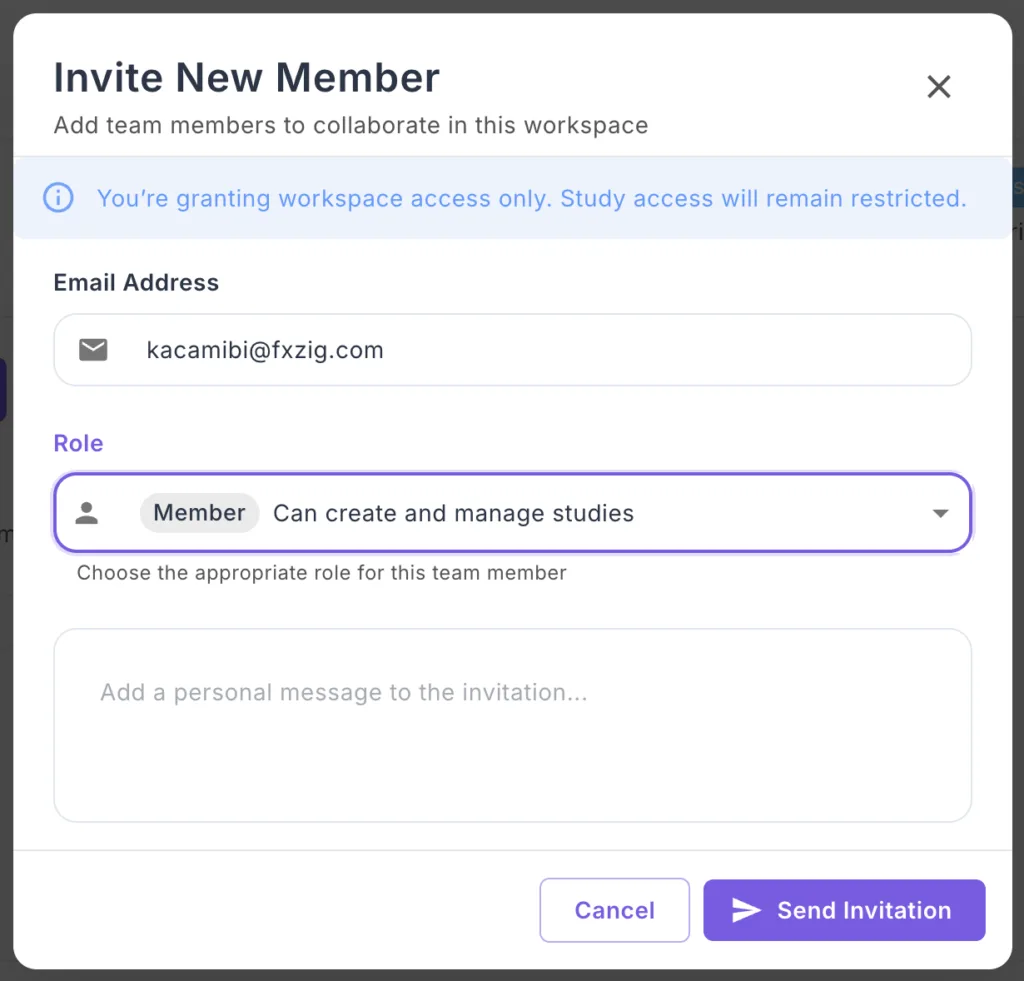
Enter Email #
- In the “Email Address” field, type the invitee’s email
- Example:
kacamibi@fxzig.com - Ensure the email is correct (no typos)
Important Notice: You’ll see a blue information banner stating: “You’re granting workspace access only. Study access will remain restricted.”
This means invited members get workspace access but individual study permissions may need separate configuration.
Step 4: Select Member Role #
Choose the appropriate role for the new member based on their responsibilities.
Choose from Available Roles #
Click the “Role” dropdown to see available options:
Member (Default):
- Description: “Can create and manage studies”
- Best for: Research team members
- Permissions: Create surveys, interviews, run analyses
Admin:
- Description: “Can manage members and workspace settings”
- Best for: Project leads, team managers
- Permissions: Everything Members can do + manage team + settings
Guest:
- Description: “Can view studies”
- Best for: Stakeholders, clients, observers
- Permissions: View-only access to research
Select the Appropriate Role #
- Click the dropdown showing “Member” (default)
- Review role descriptions
- Select the role that matches their needs
- The selected role is highlighted
Step 5: Send the Invitation #
Complete the invitation process by sending it to the member.
Send Invitation #
- Review all information:
- Email address is correct
- Role is appropriate
- Message is complete (if added)
- Click the “Send Invitation” button
- The dialog closes
- Invitation is sent immediately
What Happens Next #
Immediately after sending:
- Member receives email notification
- Invitation appears in “Pending Invites” section
- Member count updates to show pending invitation
Pending status shows:
- Orange “0” indicator changes to show pending count
- Member name appears under “PENDING INVITES” tab
Step 6: Member Receives Invitation #
The invited member receives notifications and must accept to join.
Invitation Notification #
Email notification sent to member:
- Subject: “You’ve been invited to collaborate on [Workspace Name]”
- Contains workspace name
- Shows who invited them
- Includes “Accept Invitation” button
In-app notification:
- Bell icon shows notification badge
- Notification reads: “You’ve been invited to collaborate on the [Workspace Name] workspace”
- Shows invitation timestamp
- “Accept Invitation” button displayed
Step 7: Member Accepts Invitation
The invited member must accept the invitation to join your workspace.
Acceptance Process for Invited Members #
A. Click Accept Invitation
- Member clicks “Accept Invitation” button
- From email or in-app notification
B. Accept Edit Access Dialog
- A confirmation dialog appears
- Title: “Accept Edit Access”
- Message: “By accepting edit access, you can make changes to the study but cannot manage users or billing.”
- Two options: “Decline” or “Accept”
C. Confirm Acceptance
- Member clicks “Accept” button
- System processes acceptance
D. Success Confirmation
- Success screen appears
- Purple checkmark icon displayed
- Message: “Welcome to [Workspace Name]!”
- Subtext: “You’ve successfully joined the workspace. You can now collaborate with your team members.”
- “Go to Workspace” button available
E. Access Workspace
- Member clicks “Go to Workspace”
- Dashboard opens with full workspace access
- Workspace appears in their Available Workspaces
Step 8: Verify Member Joined (For Inviter) #
Confirm the invited member successfully joined your workspace.
Check Active Members #
- Go to Team Members section
- Navigate to “ACTIVE MEMBERS” tab
- The new member appears in the list with:
- Their name
- Email address
- Assigned role (badge)
- Permissions (view, edit, admin)
- Join date
Member count updates:
- Total member count increases
- Pending invites count decreases
- Active members count increases


