How to Create and Switch Workspaces in Qualz.ai: Complete Guide
Master workspace management in Qualz.ai – your guide to creating, switching, and managing multiple workspaces for organized research. Learn how to set up workspace environments, manage teams, and switch between different research projects.
Prerequisites
Workspace creation is gated by your plan's workspace allowance. If you don't see a "Create New Workspace" option in the workspace switcher, contact your account representative to add another workspace to your plan.
How to Create a New Workspace
Creating a new workspace takes a few short steps.
Step 1: Access Workspace Creation
- Click your workspace name in the top-left corner
- Select "Create New Workspace" from the dropdown
- The Create New Workspace wizard opens
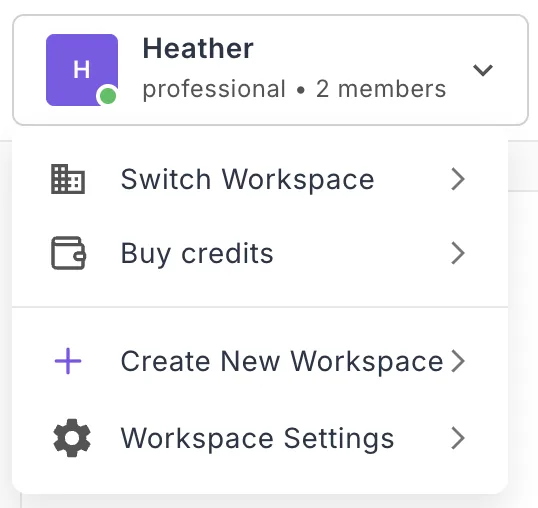
Don't see the option? Your current plan may not include additional workspaces. Reach out to your account rep to expand your allowance.
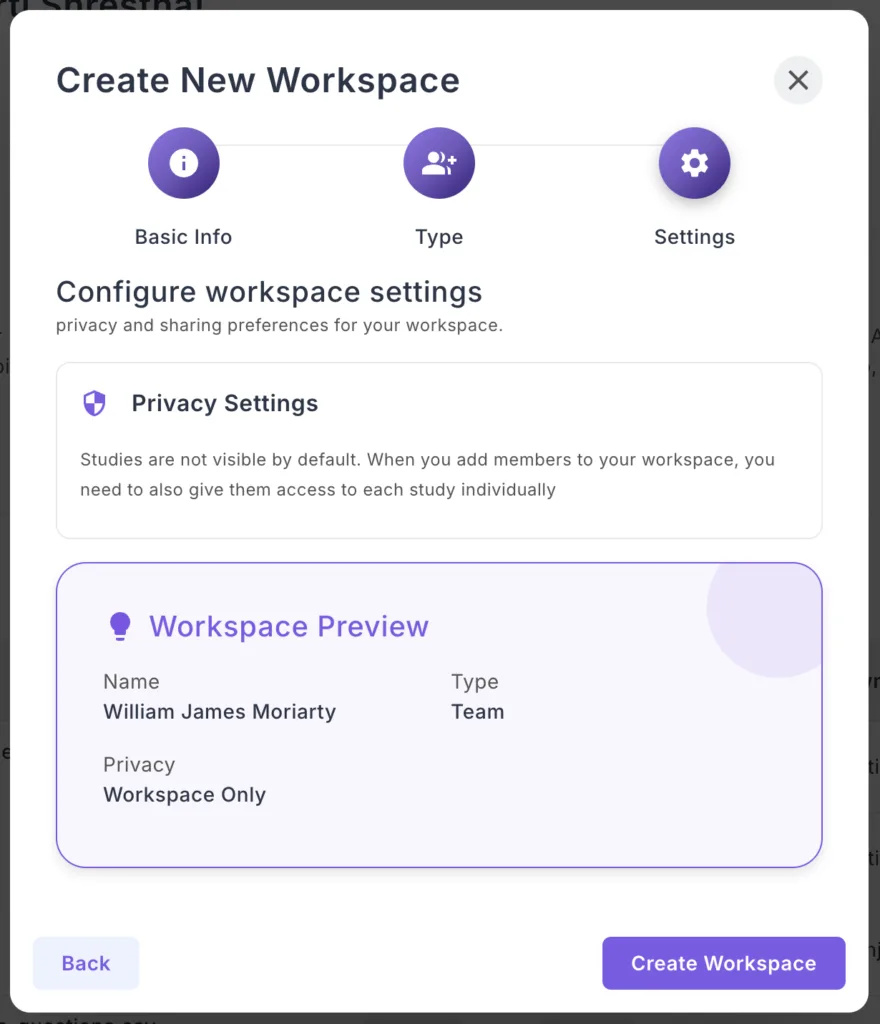
The Create New Workspace wizard is a three-step flow: Basic Info → Type → Settings. Progress through each step to configure and create your workspace.
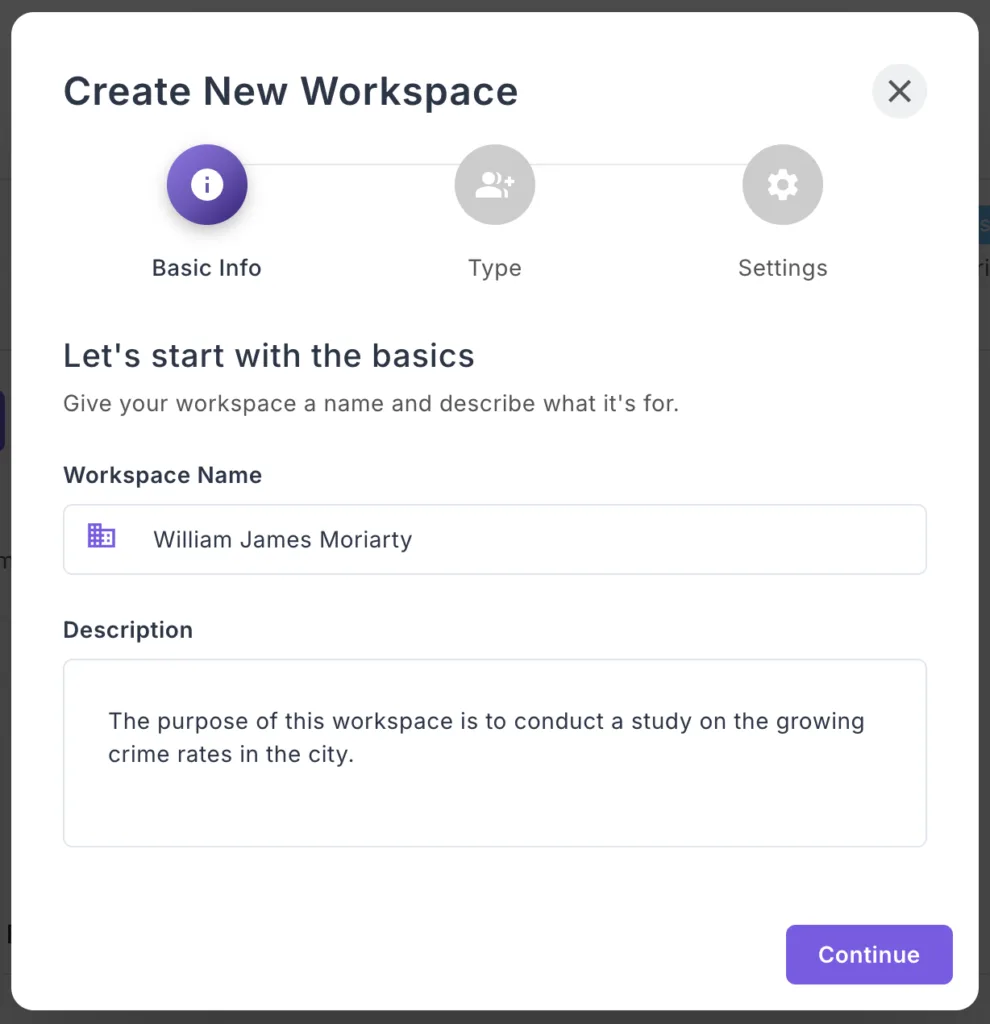
Step 2: Basic Info
Workspace Name:
- Enter a clear, descriptive name. Tip: Choose one that you or your team members can easily remember and intuitively recognize.
- Examples: "Client ABC Research" or "Healthcare Q1 2025"
Description:
- Provide a short description of what the workspace will be used for—its specific purpose. You can be as detailed as you like in this description.
- Example: "Customer satisfaction surveys for healthcare clients"
Click "Continue" to proceed to the Type step.
Step 3: Type
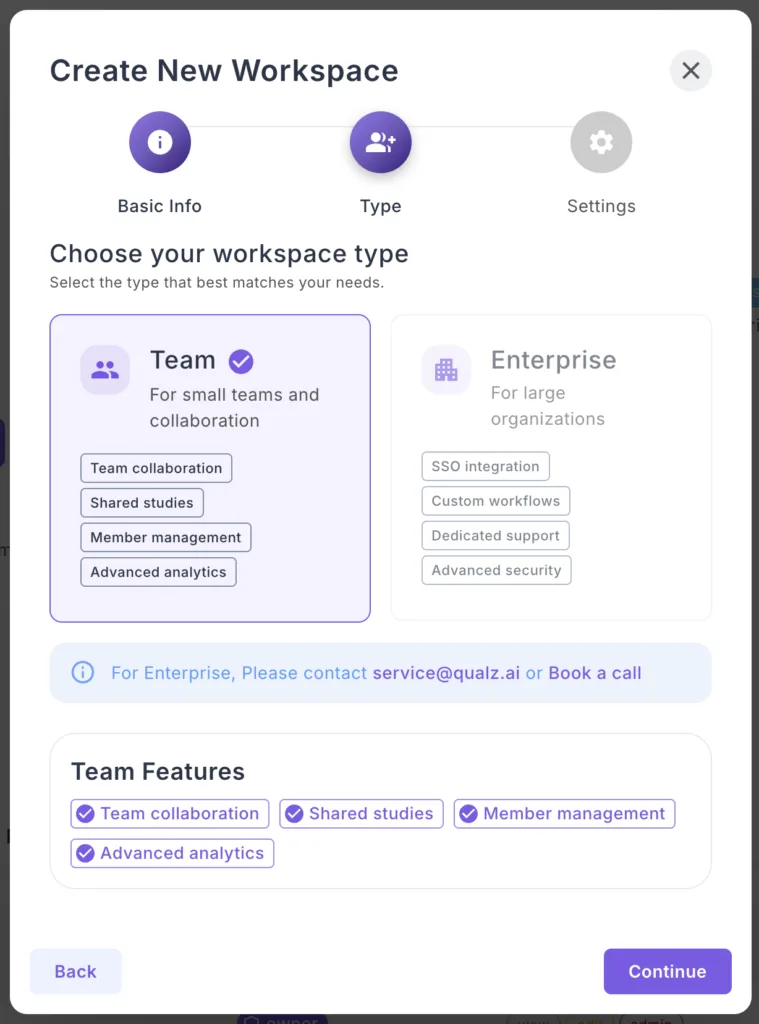
Team Workspace (Recommended):
- For small teams and collaboration
- Features: Team collaboration, shared studies, member management, advanced analytics
- Best for most users — the only self-serve option
Enterprise Workspace:
- For large organizations
- Features: SSO integration, custom workflows, dedicated support, advanced security
- Not self-serve. The Enterprise card is shown for information; you can't create an Enterprise workspace from the wizard. Contact sales@qualz.ai to discuss Enterprise needs — we'll set it up for you.
Select Team and click "Continue".
Step 4: Settings
Privacy Settings:
Choose "Workspace Only" (recommended):
- Studies are not visible by default
- Only workspace members can access research data
- Maximum privacy and security
Workspace Preview:
Review your configuration before creating:
- Name – Verify it's correct
- Type – Team
- Privacy – Workspace Only
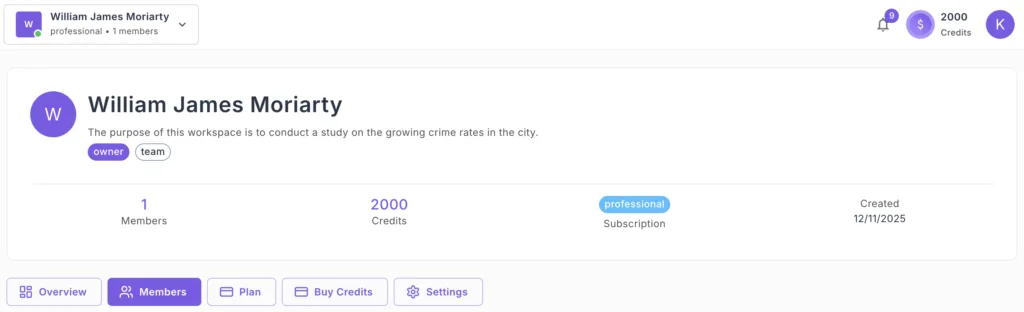
Click "Create Workspace" to provision the workspace. You'll be taken to its dashboard as soon as it's ready.
Success! Your new workspace is ready.
How to Switch Between Workspaces
Switching workspaces is quick and simple. Use this when you need to switch from one workspace to another.
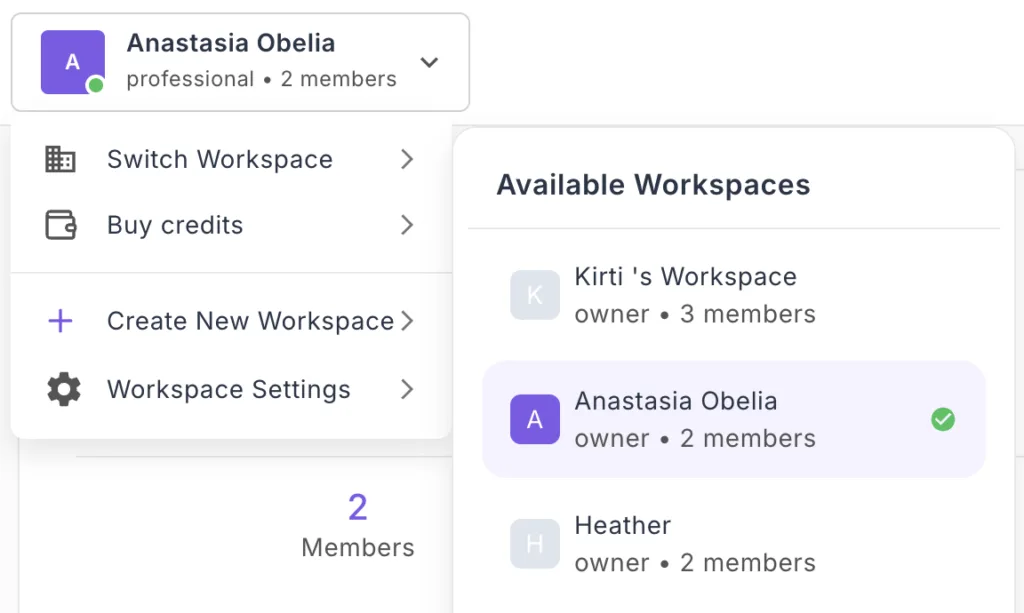
Step 1: Open the Workspace Switcher
- Look at the top-left corner of your dashboard
- Click on your current workspace name
- You'll see your workspace initial, name, tier, and member count
- A dropdown menu appears
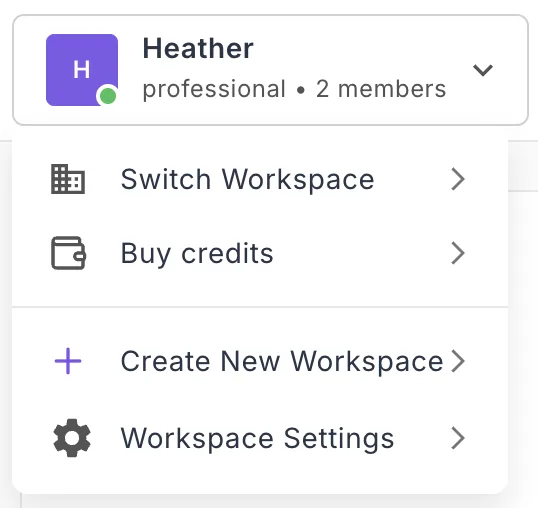
Step 2: Click "Switch Workspace"
- In the dropdown menu, click "Switch Workspace"
- The "Available Workspaces" panel slides in from the right
- All workspaces you have access to are displayed
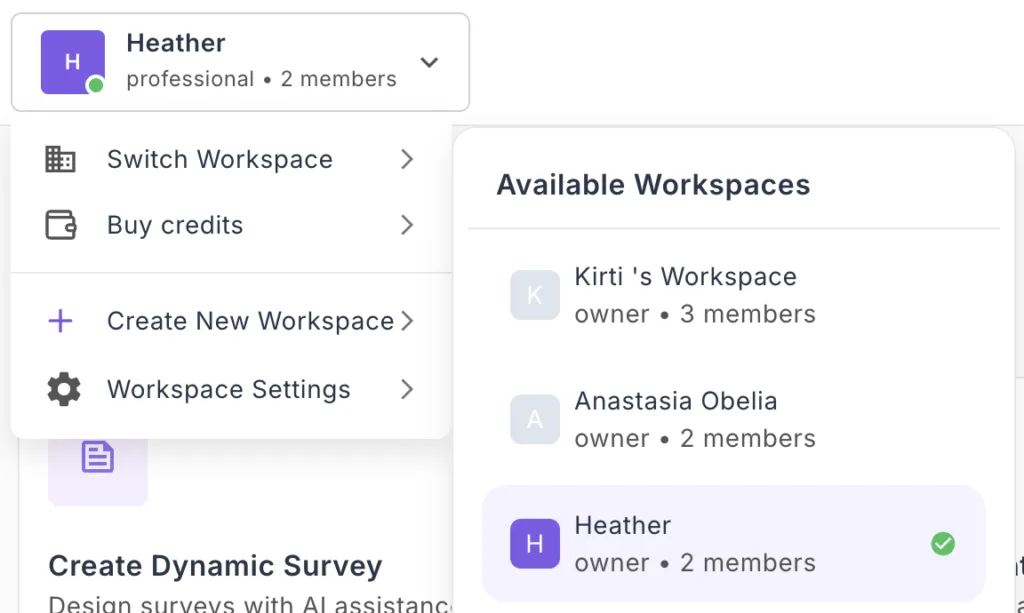
Step 3: Select Your Target Workspace
In the Available Workspaces panel, you'll see:
- Workspace name and initial
- Your role (Owner, Admin, Member, or Guest)
- Member count (e.g., "2 members")
- Checkmark on your currently active workspace
To switch:
- Click on any workspace you want to switch to.
- The dashboard immediately refreshes
- You're now working in the selected workspace
That's it! All your actions now occur within the new workspace context.