How to Design Surveys
Creating a survey starts by saying what you want to find out. Qualz.ai takes that objective, names the survey for you, and then lets you choose whether AI drafts the questions or you write them yourself.
This guide covers the Create step end to end. Configuring and sharing come afterwards, in Configure and Share.
Step 1: Open Surveys and press Create
Go to Surveys in the left sidebar. Create sits in the top right, beside Upload Your Data.
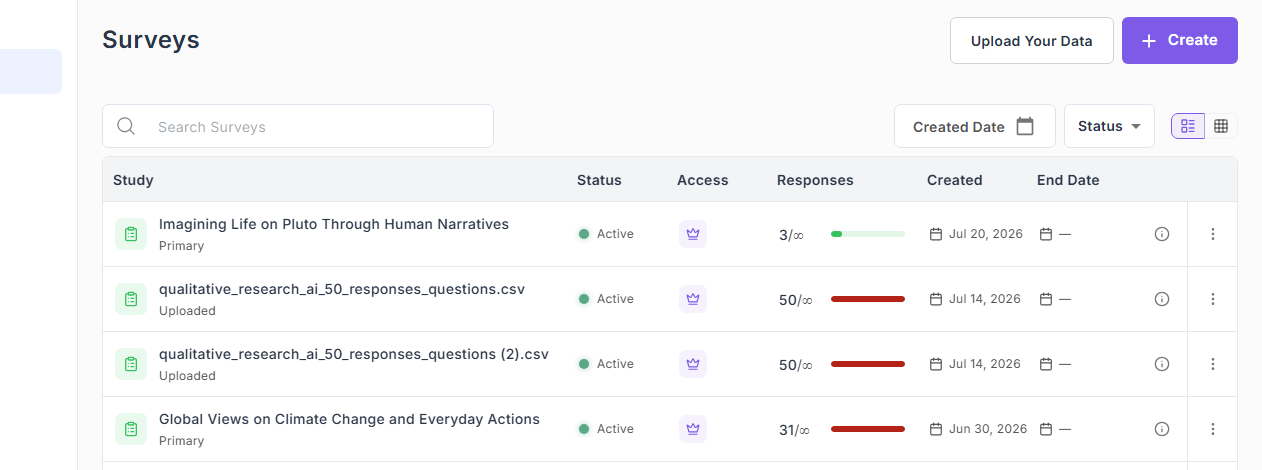
A Create New Survey dialog opens, with three steps of its own: Define Objectives, Choose Method, Build Survey.
Step 2: Say what you want to learn
The first screen asks What do you want to learn? and nothing else. It is required, and it does more work than it looks like it does.
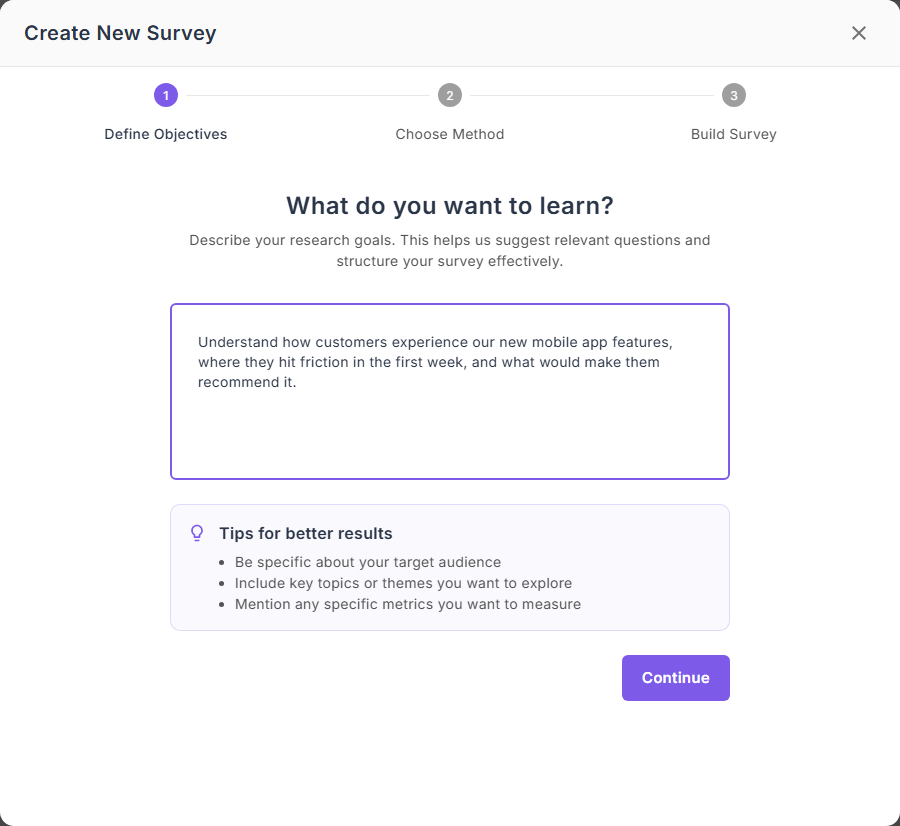
Write the research goal, not the survey topic. "Understand how customers experience our new mobile app features, where they hit friction in the first week, and what would make them recommend it" is the right shape; "Mobile app survey" is not.
What you write here is used three times over:
- It names the survey. You do not type a title. Qualz.ai generates one from the objective — the example above produced Early User Journeys and Friction in the First Week. You can rename it afterwards from the header. If you use Generate with AI, the AI may choose a new title when it drafts the survey, so check the title before you save.
- It drafts the questions, if you choose the AI route in the next step.
- It stays attached to the survey as its objective, and informs analysis later.
The tips on screen are worth following: name the audience, name the topics you want to cover, and mention anything specific you need to measure.
Press Continue.
Step 3: Choose how to build it
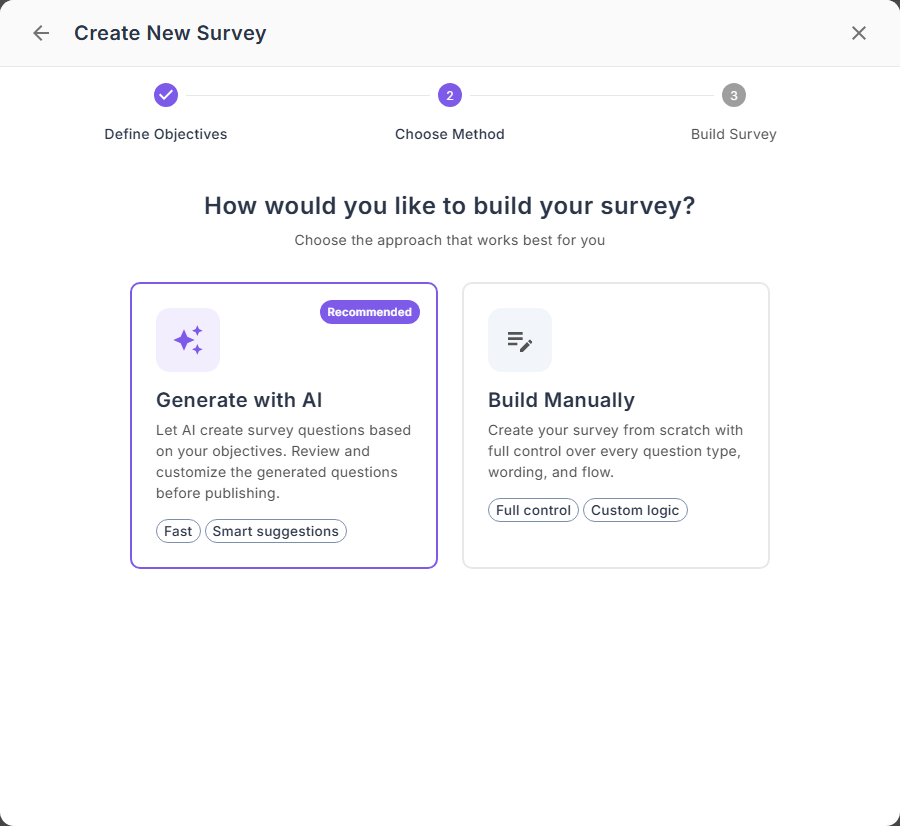
Two routes, and you are not locked into either — whichever you pick, you land in the same builder and can change everything.
Generate with AI (marked Recommended) asks for a few details, including how many sections and questions you want, then drafts the questions from your objective. Faster, and a reasonable first draft even when you intend to rewrite most of it. See Build Surveys with AI.
Build Manually opens an empty builder with one untitled question, giving you full control over wording, types and flow.
Step 4: Build the survey
The builder has the question list on the left and the editor for the selected question on the right.
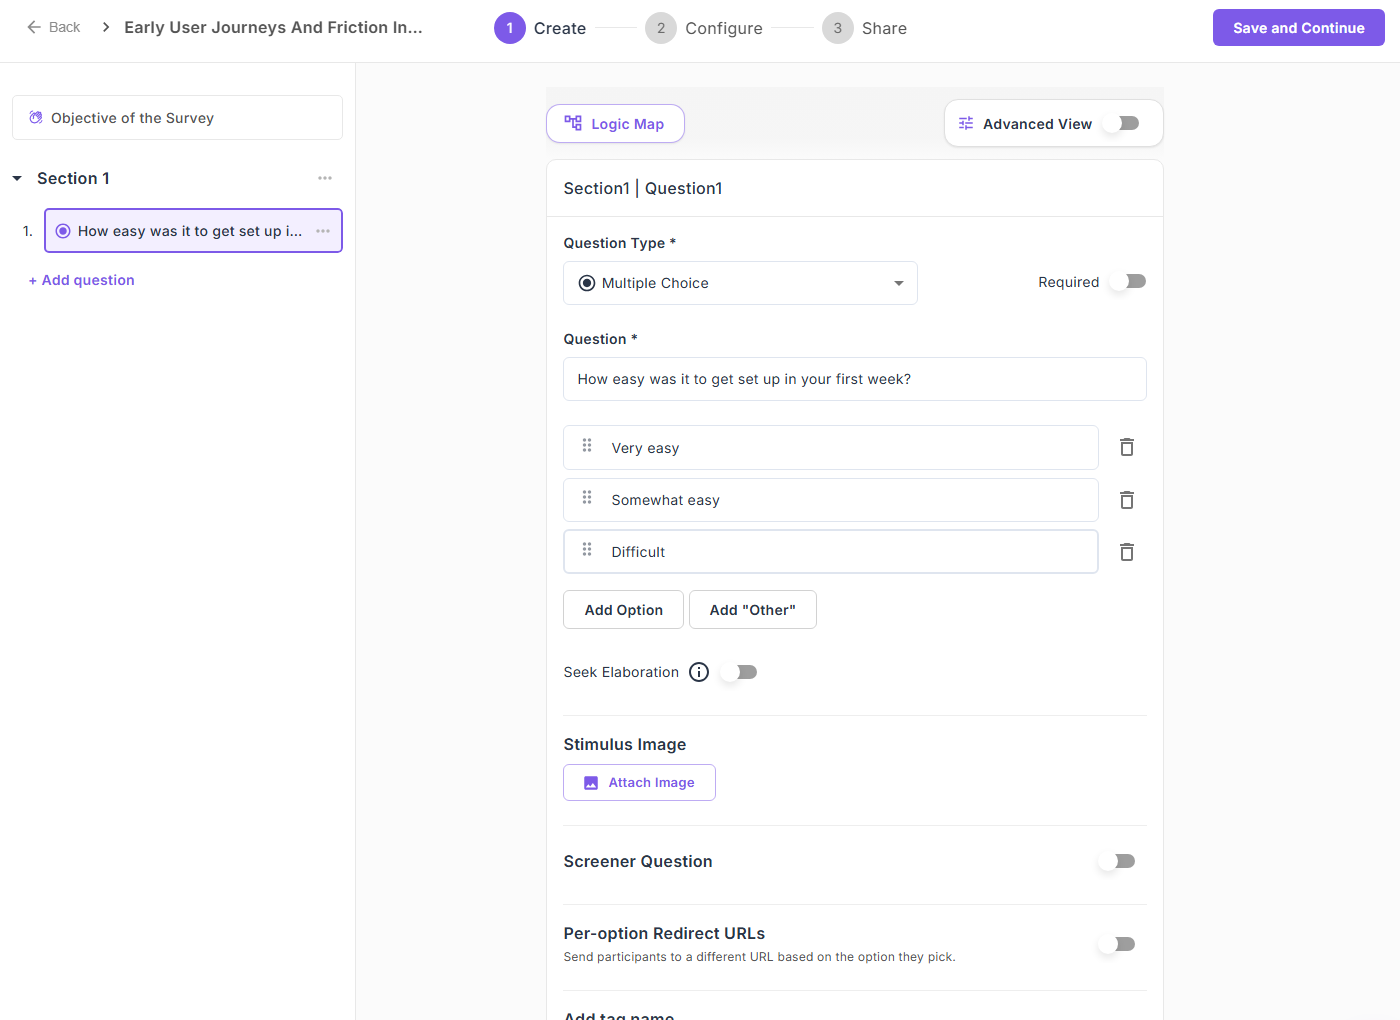
On the left — your sections and questions. Objective of the Survey sits at the top, where you can reread or revise what you wrote in Step 2. Use + Add question within a section, and Add Section to start a new one. Sections are how you give a long survey a shape participants can follow.
Across the top — Logic Map draws the whole branching and screen-out flow as a diagram, which is the fastest way to find a path that leads nowhere. Advanced View reveals the extra per-question settings.
On the right — everything about the selected question:
- Question Type and a Required toggle
- The question text and its answer options, with Add Option and Add "Other"
- Seek Elaboration — see Step 6
- Stimulus Image — attach an image for participants to react to. See Stimulus Images
- Screener Question — use the answer to screen participants out. See Screener Questions
- Per-option Redirect URLs — send participants to a different URL depending on the option they pick
- Add tag name — turn the chosen option into a tag on the response, and on any linked interview transcript
Step 5: Pick the right question type
Eight types are available, and the choice decides what analysis you get afterwards.
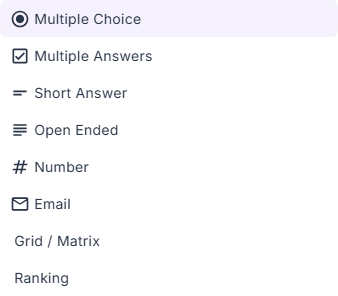
| Type | Use it for | What you get back |
|---|---|---|
| Multiple Choice | One option from several | Quantitative |
| Multiple Answers | Any number of options | Quantitative |
| Short Answer | A brief typed reply | No analysis |
| Open Ended | A considered, long-form answer | Qualitative |
| Number | A figure | No analysis |
| An email address | No analysis | |
| Grid / Matrix | Rating several items on one scale | Quantitative |
| Ranking | Ordering items by preference | Quantitative |
Short Answer and Open Ended are not the same thing. Short Answer collects the text and stops there. Open Ended is the one that feeds thematic analysis, so a question you intend to analyze qualitatively has to be Open Ended.
Grid and Ranking have their own guide: Grid and Ranking Questions.
Step 6: Turn on Seek Elaboration where it earns its place
Seek Elaboration lets the survey follow up on an answer, asking the participant to say more — the part of this product that makes a survey behave like an interview.
Use it where a bare answer leaves you guessing: a low rating, an unexpected option, an open-ended reply that stops at one line. Turning it on everywhere is the common mistake; participants tire of being asked to elaborate and the later answers get shorter.
Mark a question Required when the survey cannot be interpreted without it. Everything else should stay optional.
Step 7: Save and continue
Save and Continue is in the top right. It saves the survey and moves you to Configure, which is step 2 of the three shown in the header: Create → Configure → Share.
Nothing is live yet. Configure covers participant settings, language, redirects, the end date and the welcome message; sharing comes last. See Configure and Share.
Going further
- Build Surveys with AI — the Generate with AI route in detail
- Grid and Ranking Questions — matrix ratings and ordered preferences
- Stimulus Images — show participants a design, concept or ad to react to
- Branching and Conditional Logic — show or hide questions and whole sections based on earlier answers
- Screener Questions — filter out people who do not fit before they complete the survey