How to Use Stimulus Images in Interviews
Stimulus images let you show visual materials — product packaging, ad concepts, UI mockups, logos, prototypes, or any other image — directly to participants during an AI-moderated interview. The AI moderator controls when each image appears, talks the participant through it, and gathers their reactions as part of the natural conversation.
This guide covers everything from uploading your first image to what participants see on screen, including the comparison-image feature for side-by-side evaluations.
Why Use Stimulus Images?
Traditional qualitative interviews are entirely verbal. When the research involves visual materials, interviewers typically share their screen or hand over a printout — an awkward process that breaks conversational flow. Qualz.ai solves this by embedding images directly into the interview experience:
- Product design & packaging research — Show packaging concepts and ask participants to compare visual appeal, clarity of information, or purchase intent
- Advertising and creative testing — Present ad variations and capture spontaneous reactions
- Brand perception studies — Display logos, taglines, or brand collateral and explore associations
- UX and UI research — Show wireframes, screenshots, or prototypes and discuss usability
- Concept testing — Present early-stage ideas visually and gauge interest before investing in development
Uploading Stimulus Images (Researcher Side)
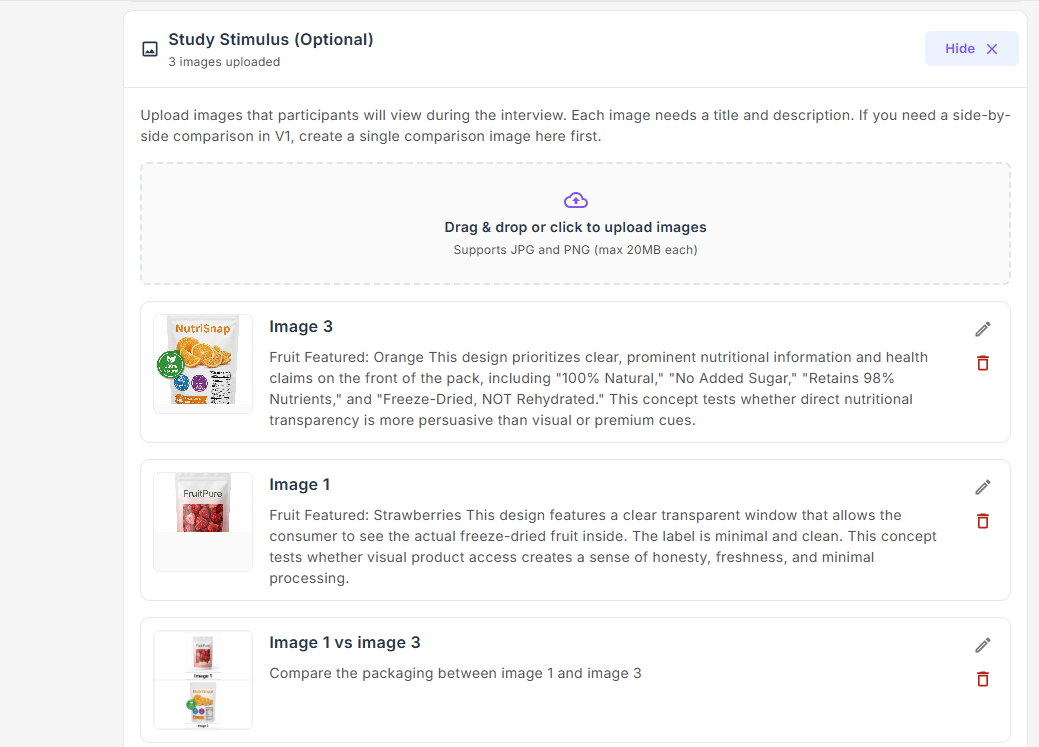
During interview setup (Step 4 of the creation wizard), expand the Study Stimulus section to manage your images.
Supported Formats and Limits
| Property | Details |
|---|---|
| File formats | JPG and PNG |
| Maximum file size | 20 MB per image |
| Upload method | Drag and drop, or click to browse |
| Number of images | No hard limit — upload as many as your study requires |
Step-by-Step Upload Process
- Open the Study Stimulus section — On the interview setup page, locate the Study Stimulus (Optional) panel and expand it.
- Drag and drop images into the upload area (or click to browse your files). Each image is uploaded immediately and a preview appears below.
- Add a title — This is the label participants will see on screen when the image is displayed. Keep it short and descriptive (e.g., "Concept A — Premium Pack" or "Homepage Wireframe v2").
- Add a description — This text is not shown to participants. It provides context for the AI moderator so it understands what the image depicts and can ask informed follow-up questions. Write a sentence or two explaining what the image shows and what you want to learn from participants about it.
- Edit or delete — Use the pencil icon to update title or description, or the trash icon to remove an image.
Creating Comparison Images
Sometimes you need participants to compare two visuals side by side. Rather than showing them sequentially, you can combine two uploaded images into a single comparison visual:
- Click the Create Comparison button (available once you have at least two images uploaded).
- Select exactly two images from your uploaded set — each selected image shows a checkmark overlay.
- Choose a layout:
- Vertical stack — Images arranged top and bottom (good for tall or portrait-oriented visuals)
- Horizontal stack — Images arranged side by side (good for wide or landscape-oriented visuals)
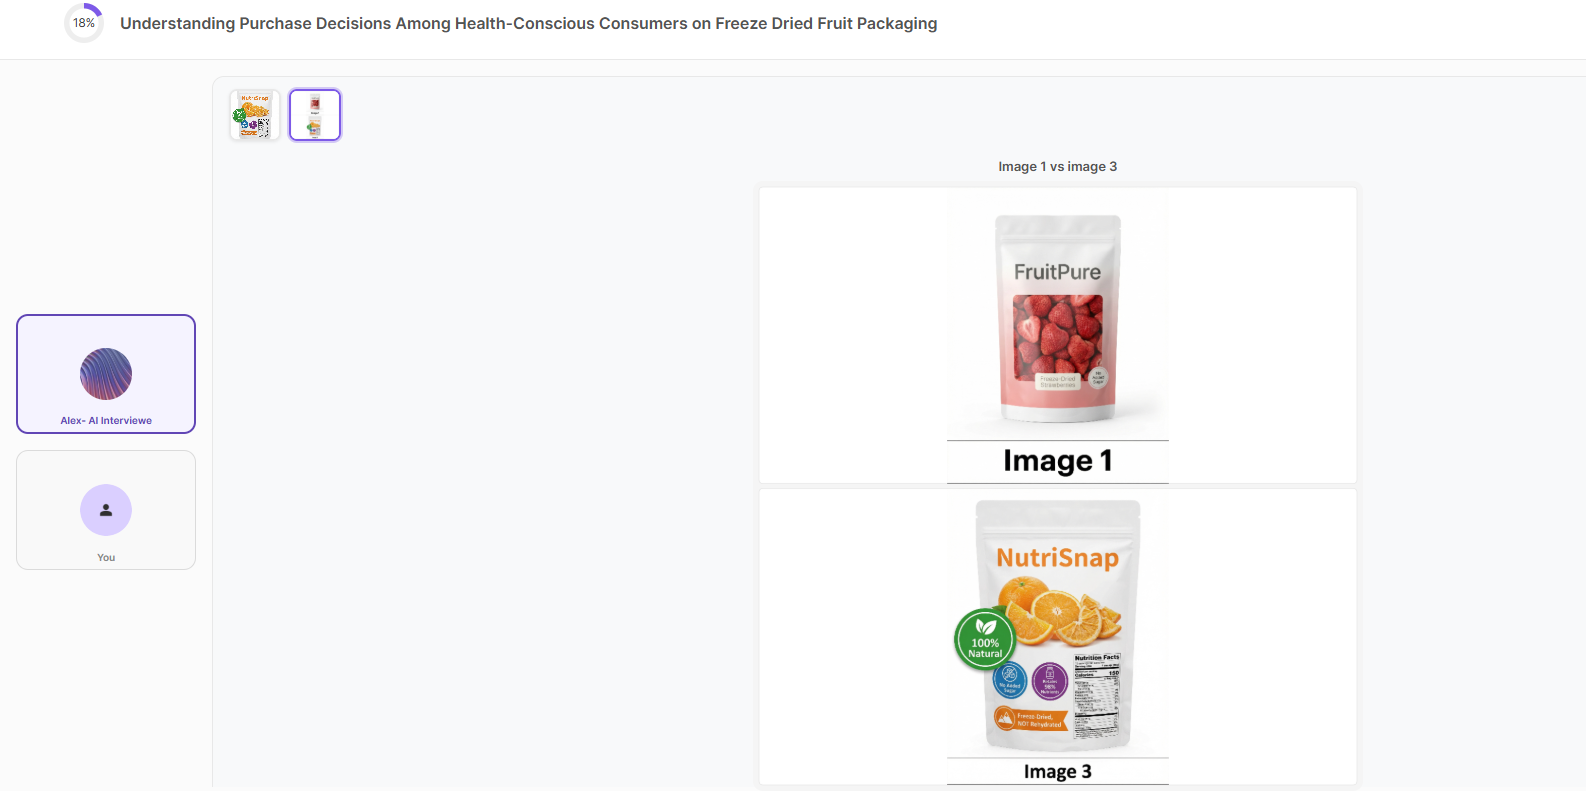
- Review the title and description — The system auto-fills these (e.g., "Image 1 vs Image 3"), but you can edit them to be more specific.
- Save — The combined image is generated as a single 1200×1200 px PNG and added to your stimulus library as a new item with its own ID.
The comparison image is treated like any other stimulus item — you assign it to a question or topic just as you would a single image.
Assigning Stimulus to Questions or Topics
After uploading, you assign each stimulus image to the specific interview guide item where you want it shown. How assignment works depends on your interview mode:
| Interview Mode | Assignment Level | How to Assign |
|---|---|---|
| Structured | Per question | Click the image icon on the question card and select one or more stimulus images |
| Semi-Structured | Per question | Click the image icon on the question card and select one or more stimulus images |
| Unstructured | Per topic | Click the image icon on the topic card and select one or more stimulus images |
Key details:
- Each question or topic can have multiple stimulus images assigned (the AI can display up to 3 at once).
- An image can be assigned to more than one question or topic if you want participants to revisit the same visual in different contexts.
- You do not need to assign every uploaded image — unassigned images remain in your library but will not be shown during the interview.
- The AI moderator automatically handles the timing: it displays assigned images just before asking the associated question or beginning the associated topic.
What Participants See During the Interview
When the AI moderator reaches a question or topic with an assigned stimulus image, it displays the visual directly in the interview interface. The participant sees the image alongside the conversation — no screen sharing, no external links, no interruption to the flow.
Single Image Display
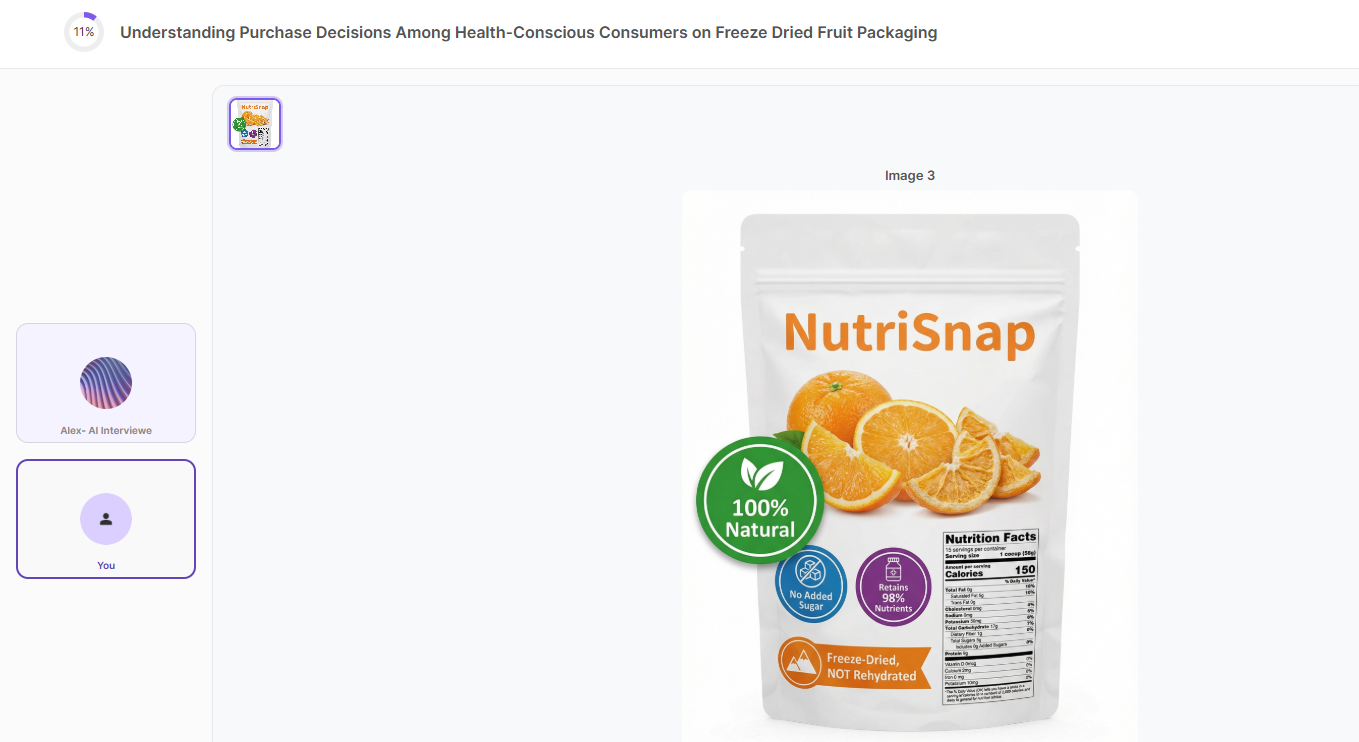
When one stimulus image is assigned, it appears prominently in the center of the interview screen with its title displayed above it.
Comparison / Multiple Image Display
When a comparison image (or multiple images) are assigned to the same question, participants see all images stacked vertically with clear labels, making it easy to compare them directly.
Thumbnail Navigation
Once an image has been shown during the interview, a small thumbnail strip appears at the top of the screen. Participants can click any thumbnail to re-open that image at full size — useful if they want to refer back to a previously shown visual while answering a later question.
Image Visibility and Flow
- Images appear automatically — The AI moderator controls when images are shown and hidden. Researchers do not need to configure timing.
- The AI introduces each image — Before displaying a stimulus, the AI says a brief orienting sentence (e.g., "I'd like to show you a packaging concept") and then confirms the participant can see it before proceeding with questions.
- Images stay visible while the associated question or topic is active.
- Images are hidden when the conversation moves to a different question or topic that does not have stimulus assigned.
- Participants can re-open any previously shown image at any time via the thumbnail strip.
How the AI Moderator Handles Stimulus
Behind the scenes, the AI moderator has access to two tools: showImages and hideImages. Here is what the AI does automatically — no configuration required from the researcher:
- Before showing an image, the AI speaks an orienting sentence to prepare the participant (e.g., "Now I'd like to show you something and get your reaction").
- Displays the image(s) assigned to the current question or topic.
- Confirms visibility — The AI asks the participant if they can see the image before proceeding.
- Asks the question or begins the topic exploration while the image remains on screen.
- Refers to images by their visible title or content (e.g., "Looking at the NutriSnap packaging..."), never by internal IDs.
- Hides images when moving to a question or topic without stimulus, keeping the screen uncluttered.
This means participants experience a seamless, conversational flow where images appear naturally at the right moment — exactly as a skilled human interviewer would present them.
Best Practices
Image Preparation
- Use high-resolution images — Images are displayed large on screen. Low-resolution or blurry images will undermine participant reactions.
- Keep file sizes reasonable — While the platform supports up to 20 MB, images under 5 MB load faster, especially for participants on mobile or slower connections.
- Use a clean background — Remove clutter around the subject so participants focus on what matters.
- Consistent sizing — If comparing multiple concepts, try to make all images similar dimensions for a fair visual comparison.
- Label clearly — Use descriptive titles ("Premium Packaging — Concept A") rather than generic ones ("Image 1") so participants and the AI can reference them naturally.
Writing Effective Descriptions
The description field is your way of coaching the AI moderator. Good descriptions lead to better, more targeted follow-up questions:
- Do: "This design features a clear transparent window to show the actual product inside. The label is minimal. We want to test whether visual product access creates a sense of honesty and freshness."
- Don't: "Product image"
Include what the image shows, what makes this version distinctive, and what you want to learn from participants about it.
Study Design Tips
- Don't overload with images — Showing too many visuals in a single interview can cause fatigue. Aim for 3–6 stimulus items per 15-minute interview.
- Order matters — Assign images to questions in a logical sequence. Start with individual concepts before moving to comparisons.
- Use comparisons strategically — Side-by-side comparisons are powerful for preference testing. Use the comparison-image feature when you need direct A/B evaluation.
- Pilot test with AI Participants — Before launching with real participants, run a test interview with AI Participants to verify that images appear at the right moments and the AI references them correctly.
- Consider mobile participants — Images are responsive and will scale to fit mobile screens, but complex visuals with fine detail may be harder to evaluate on small screens. Mention in your recruitment screener if a desktop or tablet is preferred.
Stimulus in Survey Questions vs. Interviews
If you are also running surveys on Qualz.ai, note that stimulus images work differently in each format:
| Feature | Surveys | Interviews |
|---|---|---|
| Assignment level | One image per question | One or more images per question/topic |
| Image placement | Above or below the question text | Controlled by the AI moderator |
| Comparison support | Combine images manually before upload | Built-in comparison image creator |
| Participant control | Static — image always visible with the question | Dynamic — AI shows/hides images; participants can re-open via thumbnails |
| AI interaction | None — image is simply displayed | AI introduces, confirms visibility, and references the image in conversation |
For survey-specific guidance, see How to Add Stimulus Images to Survey Questions.
Frequently Asked Questions
Can participants zoom in on stimulus images? Participants can click a thumbnail to open a full-size preview of any image that has been shown during the interview. The image displays at its native resolution within the interview window.
What happens if a participant's connection is slow? Images are loaded asynchronously. If an image takes a moment to load, the AI will wait for the participant to confirm they can see it before proceeding with questions.
Can I change stimulus images after the study has started? You can add, edit, or remove stimulus images from the study setup at any time. However, changes will only take effect for future interview sessions — sessions already in progress or completed will not be affected.
Can the same image be used across multiple studies? Images are uploaded per study. To reuse an image in a different study, upload it again in that study's setup.
Is there a limit on how many images I can upload? There is no hard limit on the number of stimulus images per study. However, for the best participant experience, we recommend keeping the number aligned with your interview duration (see Best Practices above).
Planning a visual research study? Our team can help you design your stimulus strategy, set up comparison tests, and make the most of image-based interviews. Book a call →
Related Guides
- How to Create an AI-Moderated Interview — Step-by-step creation guide including stimulus upload
- Understanding Interview Types — How stimulus assignment differs across Structured, Semi-Structured, and Unstructured modes
- How to Add Stimulus Images to Survey Questions — Stimulus in the survey builder
- How to Generate AI Participants — Pilot test your stimulus-based interview before launch